
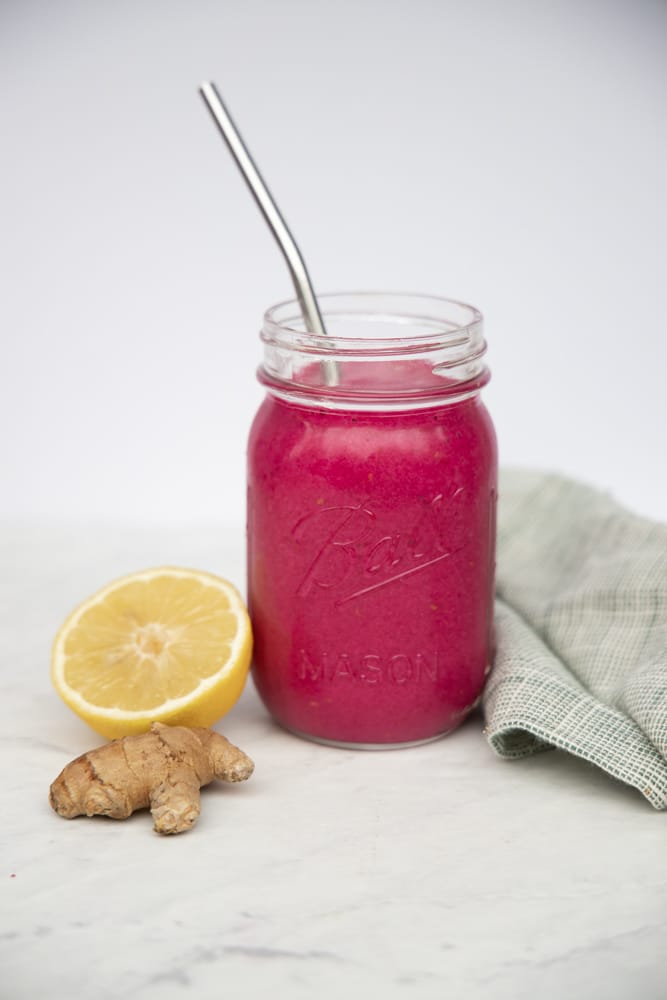
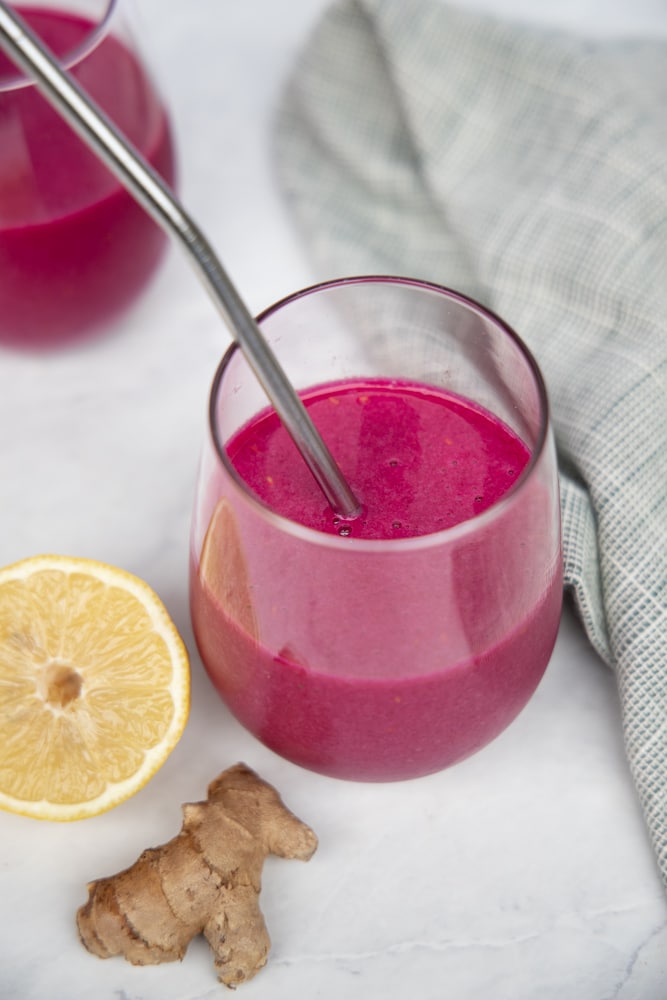
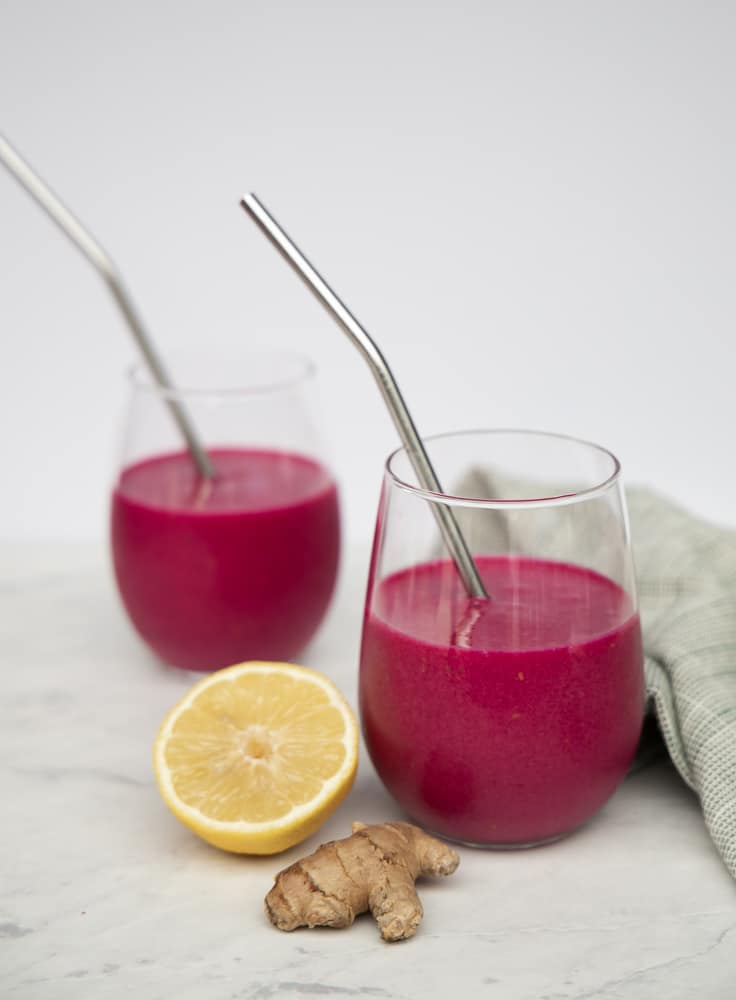
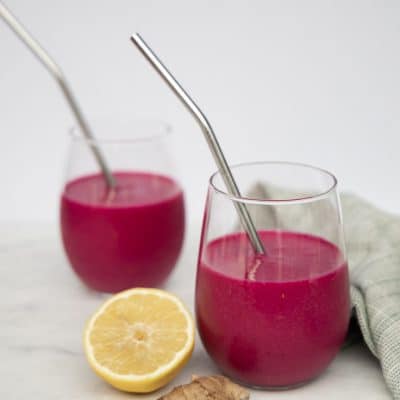
This raspberry coconut beet smoothie is the perfect way to kickstart your morning with tons of vitamins and minerals! Regardless of the season or temperature, smoothies are such a quick and easy option for a healthy breakfast on the go. This particular smoothie is bright, zippy, and the most gorgeous shade of pink you’ve ever seen!
unexpected smoothie ingredients
I am such a fan of smoothies as a quick and easy way to get some good nutrients in my system when I’m rushing out the door in the morning. In my house, we tend to get stuck in the rut of making the same old mixed berries, almond butter and banana smoothie because my kids love it.
In order to mix things up a little bit I started to look to other ingredients to give a more complex flavor and additional vitamins. That’s how this smoothie was born!
- Beets: I love using beets for the unreal color they add! They instantly boost my mood! They reduce blood pressure and blood sugar levels, and are a great source of folate, potassium and antioxidants.
- Lemon juice: Fresh squeezed lemon juice is essential in this recipe. It majorly brightens up the flavors with the punch of acidity it adds. If you’re feeling crazy, go ahead and add the zest as well! Your immune system will thank you!
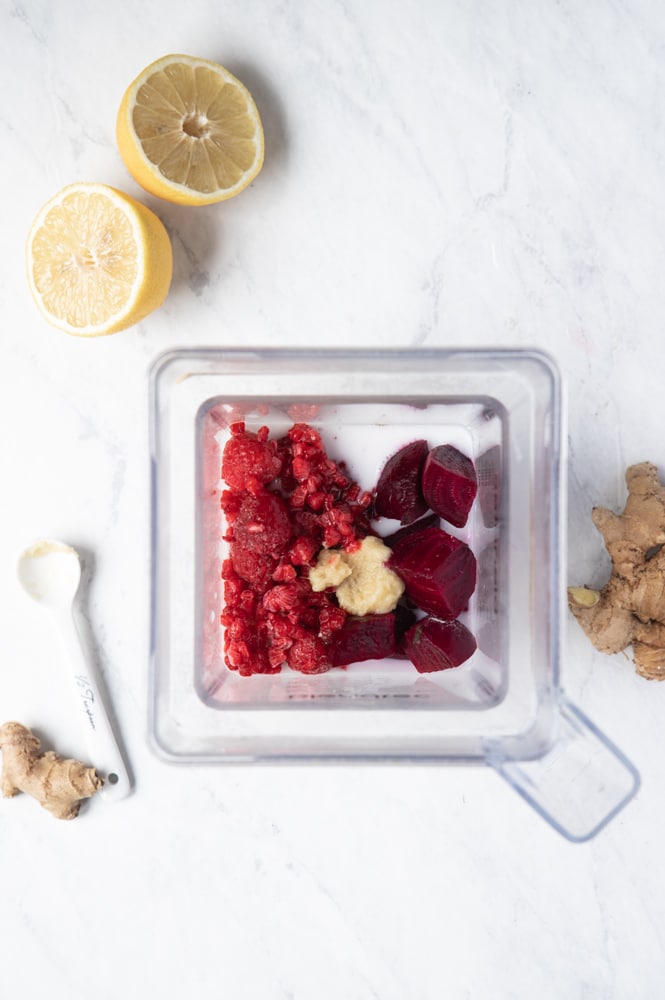
- Ginger: Once you start adding fresh ginger to your smoothies, there’s no turning back! For any fruity or tropical smoothie, ginger is an excellent addition. It adds a spicy and zingy flavor that helps balance out the sweetness and also aids in digestion.
How to prepare the beets for this smoothie recipe
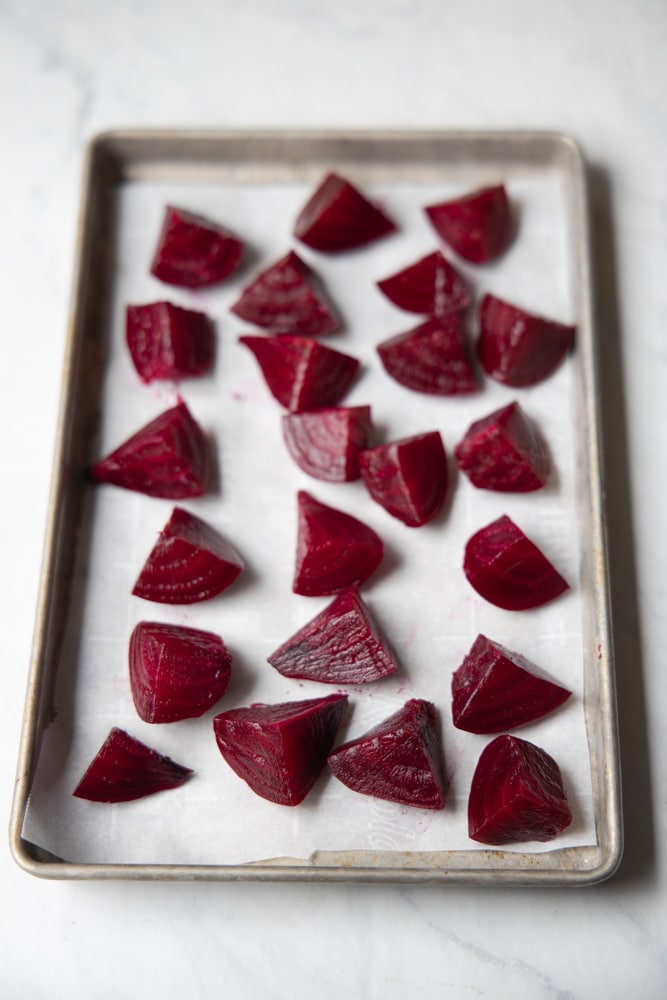
For the longest time, I would purchase the pre-cooked and peeled beets that I could find at Trader Joes because of their sheer convenience. However, once I discovered how easier they were to cook myself, I’ve added it into my weekly meal prep rotation!
Second of all, not only are they super easy to prepare, the flavor and color is unparalleled! I tested this recipe extensively and the difference it made in cooking the beets myself was incredible. The flavor was less earthy and the color was so much more vibrant!
My favorite way to cook beets is to steam them! It only takes 15 minutes compared to roasting them in the oven which takes closer to 45. I quarter them and pop them in a steam basket in a pot filled slightly with water and steam with a lid on for 15 minutes, or until they are fork tender but not mushy.
Then you can take each chunk and rub it around in a paper towel (watch out, beets will stain your nice linen dish towels or your hands!) to remove the skins. Once cooked, I will spread them out on a small cookie sheet lined with parchment paper and pop them in the freezer for 1-2 hours. This ensures that when you add them to a freezer bag of Tupperware container, they won’t freeze together in a giant clump.
You don’t have to use frozen beets in this recipe but it will help you achieve more of that slushy, frozen texture and keep it from getting too runny.
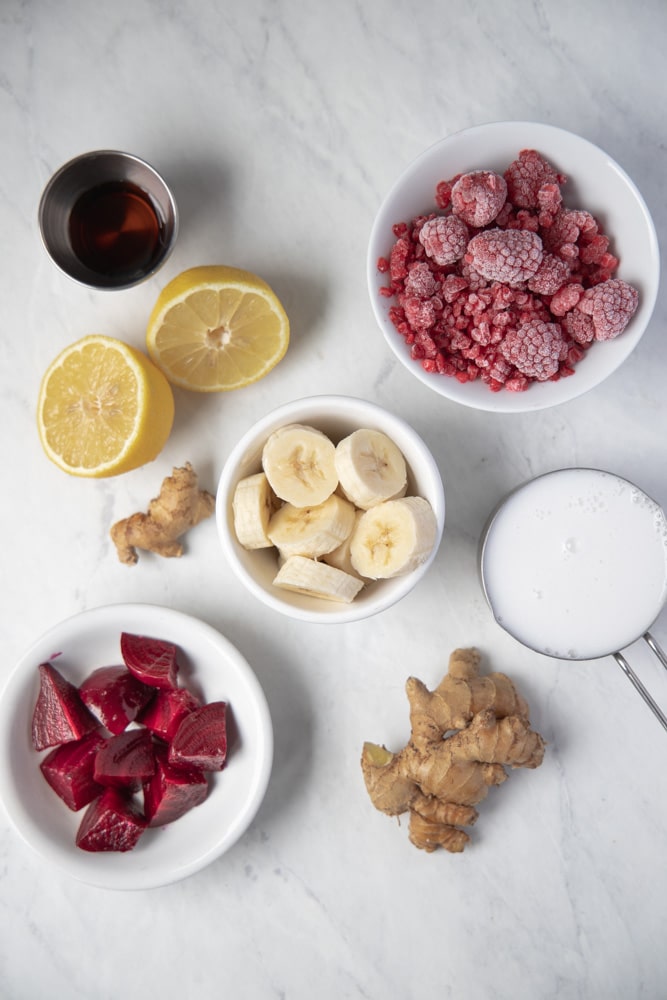
INGREDIENTS AND SUBSTITUTIONS
- EQUIPMENT: A high powered blender will give you the smoothest texture but a food processor also works in a pinch!
- FROZEN RASPBERRIES: The raspberries are key in this recipe. I’ve tried it with strawberries, or a mix of both, and it just isn’t the same. Raspberries give it a tanginess that merries super well with the earthy beets and creamy coconut milk.
- BANANA: I love the body and creaminess bananas add to this recipe but if you’re not a fan you could also add a big spoonful of plain greek yogurt.
- GINGER: I prefer freshly grated ginger but in a pinch you can substitute the store-bought kind that comes pre-grated in a glass jar in the produce section.
- BEETS: As I said before, I’m a big fan of cooking and freezing chunks of beets yourself but if you’re tight on time you can absolutely use the store-bought kind. You just won’t have the same strikingly pink color.
- COCONUT MILK: I prefer the taste of coconut milk in this smoothie because I find some of the other milk alternatives to be too nutty for the flavor profile here. However, if all you have is soy, hemp, almond, or oat milk on hand then by all means, go for it! You could also use canned coconut milk but you’ll find it’s higher in calories.
- HONEY: Either honey OR agave are my go-to’s for sweetening this smoothie, You could also skip the sweetener all together but I find that just a touch really helps to balance out the flavors.
- LEMON JUICE: I love the punch of acidity that fresh squeezed lemon adds to this recipe. I’ve also made it with orange juice since beets and oranges are a classic combination. If you use oranges instead, you may want to skip the honey because the orange juice is sweeter than lemon.
PRO TIPS FOR MAKING THIS SMOOTHIE
Regardless of what blender you’re using, you’ll get the best results if you start with the most chunky and hard ingredients on the bottom. That way they are closest to the blades and will get the smoothest texture without any weird clumps.
Then layer on with the softer ingredients (like banana) and finish with the liquid last. Keep a little extra liquid nearby in case it needs an extra splash to get churning. Make sure you peel your ginger and rough chop before adding, and use a sieve to catch any stray seeds when you squeeze your lemon.
For extra protein and nutrients you can also try adding hemp seeds or flax seeds to the mix!
Other than that, you’re good to go!
Raspberry Coconut Beet Smoothie
Equipment
- blender
Ingredients
- 1 cup frozen raspberries
- 1 banana
- 1/2 cup frozen beets
- 1 cup coconut milk
- 1 whole lemon, juiced
- 1 tsp ginger, peeled and rough chopped
- 1 tbsp honey or agave
Instructions
- Place all the ingredients in a blender with the frozen raspberries and frozen beets on the bottom. Blend until completely smooth, adding additional liquid if necessary.
Notes
- If you don’t have frozen beets, cooked are also fine. Just add a few ice cubes to the blender as well.
- You can also swap out orange juice for the lemon juice.
- You can swap out the coconut milk for soy, hemp, almond, or oat milk.

Looks delish! I love that blender shot, too!
Why cook the beets at all?
Great question! You don’t have to cook them and obviously the are more nutritious raw. I just find that my blender doesn’t quite blend the raw ones up well enough to get a nice smooth texture. I think a vitamix blender could probably do the trick though!